Save Your Bouquets with These 3 Easy Flower Preservation Techniques
Posted on 25/05/2025
Save Your Bouquets with These 3 Easy Flower Preservation Techniques
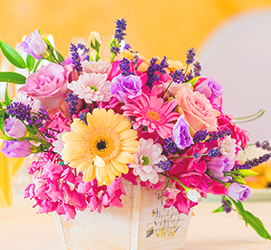
Flowers have a special way of brightening up any occasion, from weddings and anniversaries to birthdays and graduations. But, when the celebration is over, it can be heartbreaking to watch those beautiful bouquets wither away. What if you could preserve the beauty of your floral arrangements for years to come?
Welcome to the world of flower preservation- a simple yet magical way to keep your cherished blooms looking vibrant long after the special day has passed.
Why Should You Preserve Your Bouquets?
Bouquet preservation isn't just for sentimental souls; it's an eco-friendly and creative approach to reduce waste and create lasting memories. Preserved flowers can be used for home decor, keepsakes, gift giving, or even as a way to remember the most meaningful moments in your life. From wedding bouquets to graduation leis, saving your blooms allows you to hold on to the joy they brought on your special day.
In this guide, we'll explore three easy techniques for flower preservation that anybody can try at home. Whether you're new to the idea of dried flowers, or looking for new creative ways to keep your bouquets, these methods will help you enjoy your blossoms well into the future.

1. Air Drying: The Classic Method for Preserving Flowers
How Does Air Drying Work?
This tried and true technique has been used for centuries and is perhaps the most accessible way to save your bouquets at home. The process is simple: removing moisture from the flowers allows them to maintain their shape, color, and even scent for months (or longer), depending on the type of bloom.
Step-by-Step Guide to Air Drying Flowers
- Select Your Flowers: Not every flower dries the same way. Sturdy, less juicy flowers like roses, lavender, statice, and baby's breath are ideal for drying. Avoid blooms with thick, moist stems, as these may be more susceptible to mold.
- Prepare the Bouquet: Remove excess foliage and any petals that are already wilting. Separate individual flowers if necessary.
- Group and Tie: Gather your stems into small bunches and tie them with twine, rubber bands, or string about two inches below the flower heads.
- Hang Upside Down: The best way to dry flowers is by hanging them upside down in a well-ventilated, dark, and dry area. Closets, attics, or spare rooms work perfectly!
- Wait and Observe: Most bouquets will dry in 2-4 weeks. Try not to disturb them during this period, as the drying process is crucial to maintaining their shape.
- Finish with a Floral Spray: For added longevity, gently spritz your dried flowers with hairspray or a professional floral sealant. This can help reduce brittleness and shed.
Pros and Cons of Air Drying Flowers
- Pros:
- Requires no special equipment
- Chemical-free and all natural
- Great for wildflowers and garden cuttings
- Retains delicate fragrance
- Cons:
- Some colors may fade over time
- Not suitable for very moist or heavy flowers
- Takes weeks to complete
2. Pressing Flowers: Timeless for DIY Art and Keepsakes
Why Pressed Flowers?
Pressing is a beautiful, nostalgic way to save your favorite flowers and turn them into personalized works of art. Think handcrafted bookmarks, greeting cards, framed wall art, and more. Pressed flower preservation works best with blossoms that are smaller and naturally flat, such as violets, pansies, and daisies.
How to Press Flowers with a Book
- Pick Your Flowers at Peak Freshness: For best results, harvest flowers at their peak. Avoid any with bruises or spots.
- Pre-Dry: If the flowers have dew or moisture, gently blot them dry with a paper towel.
- Arrange on Paper: Open a thick book and line it with parchment, wax paper, or blotting paper. Lay each flower flat, arranging the petals in the desired orientation.
- Close the Book and Add Weight: Gently close the book and, to be extra careful, add more heavy books or a weight on top.
- Wait: Pressing takes about 2-4 weeks, depending on humidity and the type of flower.
- Reveal and Create: Once pressed, your flowers are ready to use in creative projects or simply to display.
Modern Variations of Flower Pressing
- Microwave flower presses for quick results (minutes instead of weeks)
- Specialized flower pressing kits available online
- DIY wooden presses for larger blossoms or more intricate arrangements
Best Uses for Pressed Flowers
- Scrapbooking memories
- Custom phone cases and tech accessories
- Framed art or greeting cards
- Decorating candles, journals, or coasters
Tips for Getting the Best Results:
- Thinner flowers press more easily and retain color better.
- Dry thoroughly to prevent mold or browning.
- Arrange flowers as you want them to appear once pressed - they won't move after pressing!
3. Silica Gel Drying: Fast and Professional-Quality Results
What is Silica Gel Drying?
If you want to preserve the whole bloom with vibrant color and minimal shrinkage, silica gel is a game-changer. Silica gel is a non-toxic, reusable desiccant that rapidly absorbs moisture - making it the best choice for fuller, more delicate, or rare flowers like peonies, lilies, and orchids.
Easy Steps to Save Your Bouquets with Silica Gel
- Gather Supplies: You'll need silica gel crystals (found online or at craft shops), an airtight container, scissors, and your prepared flowers.
- Trim and Prep: Cut stems to about 2 inches long and remove excess leaves or blemished petals.
- Layer Silica Gel: Pour a 1-inch layer of silica gel in the bottom of your container.
- Arrange Flowers: Place flowers face up on the layer, ensuring they don't touch each other.
- Cover with More Gel: Gently pour silica gel over the flowers, making sure it gets between petals. Cover completely but don't crush the flowers.
- Seal and Wait: Put the lid on tightly and leave the container in a dry, dark place. Most flowers take 3-7 days to dry completely using silica gel.
- Remove Carefully: Use a small spoon or paintbrush to uncover and gently remove the dried flowers.
- Final Touch: Spray with clear acrylic or floral sealant to protect from moisture.
Benefits and Drawbacks of Silica Gel Drying
- Pros:
- Preserves original color, shape, and detail exceptionally well
- Works for nearly any flower variety
- Fast drying process
- Cons:
- Requires purchasing silica gel and airtight containers
- Flowers are delicate after drying-handle with care!
- More complex than other methods, but worth the results
Where to Get Silica Gel
You can find silica gel at most craft stores, online retailers, or floral supply shops. Remember: Silica gel can be reused after you dry it out in an oven (just follow packaging instructions).
Which Flower Preservation Method is Right for You?
Choosing how to preserve your bouquets depends on the types of flowers you have, your intended use, and how much time you can dedicate to the process.
- Want a rustic, vintage look for bouquets or arrangements? Try air drying!
- Love making art, cards, or scrapbooks with your florals? Pressing is your best choice.
- Need to keep your blooms looking fresh and vibrant? Use silica gel drying for the most professional results.
No matter which flower preservation technique you choose, you'll be able to save your bouquets and relive those happy memories whenever you see your dried treasures.
Creative Ways to Use Preserved Flowers
Don't let your preserved blooms gather dust! Here are some modern, creative ideas to display and cherish your dried bouquets:
- Shadow Boxes: Create a 3D display for your wedding bouquet or graduation flowers.
- Resin Art: Encapsulate pressed or dried flowers in resin to make custom jewelry, keychains, or paperweights.
- Candles and Soaps: Decorate handmade candles or soaps with thin slices of dried flowers for a Bohemian flair.
- Potpourri: Combine dried petals with essential oils for all-natural home fragrance.
- Wall Hangings and Wreaths: Hang dried bouquets or create stunning wreaths for seasonal decor.
- Custom Gifts: Give a keepsake to friends or family--a dried flower bookmark, card, or framed art piece is both beautiful and meaningful.
Caring for Your Preserved Bouquets
- Keep preserved flowers out of direct sunlight to prevent fading.
- Dust gently using a soft brush or can of compressed air.
- Avoid humid areas to prevent mold and deterioration.

Frequently Asked Questions on Flower Preservation
How long do preserved flowers last?
Dried or preserved flowers can last for months to years, depending on the method and your care routine. Properly air dried or silica gel preserved flowers typically look great for up to 2-3 years or longer.
Do preserved flowers still smell?
Some dried flowers, especially air dried lavender and roses, retain a mild natural scent for several weeks or months. However, scent usually fades with time. Adding a touch of essential oil drops can revive fragrance if desired.
Can I preserve my entire bouquet?
Absolutely! You can preserve the whole arrangement using a combination of the methods above, or disassemble and preserve select blooms that hold the most significance.
Will the color fade?
Colors will change slightly during the drying process; air dried flowers may fade to softer hues, while silica gel helps flowers retain vibrant color. Keep your dried bouquets out of strong sunlight to minimize fading.
Conclusion: Save Your Bouquets and Memories
Whether you're holding on to your wedding bouquet, displaying spring garden flowers, or preserving a heartfelt gift, these three easy flower preservation techniques are time-tested and simple to do at home.
- Air drying--classic and chemical-free, perfect for rustic charm.
- Pressing--ideal for sentimental artwork and creative projects.
- Silica gel drying--for the most vivid, lifelike preserved flowers.
Embrace the art of preserving bouquets and enjoy the beauty of flowers long after they're picked. With just a little time and creativity, you can celebrate life's best moments--with flowers that never fade.
Ready to save your bouquet? Start with one of these techniques today and transform your blooms into lasting keepsakes!
Latest Posts
Top 10 Florists Near [BOROUGH/NEIGHBOURHOOD] in [AREA]
Dive into the colorful world of peony flower meanings
Comprehensive Guide to Orchid Maintenance